This is the 1st time I have ever made asparagus. It was really good
Asparagus
A bunch of Asparagus
1/2 stick of butter
some garlic powder
Melt the butter in sauce pan, throw the asparagus in the pan, roll it around to get it coated with the butter. Sprinkle on some garlic powder. Cook 5-10 minutes, until tender (or whatever texture you would like), eat!
Monday, March 30, 2009

Menus for March 29 to April 3
March 29 - Homemade Pizza
March 30 - Pork and Pineapple Curry and Asparagus
March 31 - I don't remember!
April 1 - Bologna sandwiches from the 1 day VBS at church
April 2 - Greg's parents were here and we went out for his birthday
April 3 - Went out for Greg's birthday
March 30 - Pork and Pineapple Curry and Asparagus
March 31 - I don't remember!
April 1 - Bologna sandwiches from the 1 day VBS at church
April 2 - Greg's parents were here and we went out for his birthday
April 3 - Went out for Greg's birthday
Homemade Pizza
We had Kevin and Sarah over Sunday night for this. We all really enjoyed it!!! I really like the homemade pizza sauce too! That really added!
Self-Rising Pizza Crust
From: Hillbilly Housewife
For the Crust:
-
2-1/2 cups flour
- 2 teaspoons baking powder
- 1 teaspoon salt
- 1 teaspoon dry yeast
- 3/4 cup water
- 1/4 cup oil
In a medium sized bowl combine the flour, baking powder, salt and yeast. Stir it up to distribute the salt and yeast evenly. Add the water and oil. You may need a spoonful or two more of water if the day is dry. Mix the dough with a wooden spoon until it forms a big ball in the middle of the bowl. It will be a little stiffer than biscuit dough. Knead the dough about 10 or 12 times and then form it into a ball. Place the ball in the center of 16-inch pizza pan, or a 9 by 13-inch rectangular pan. Use your hands and a rolling pin, to press the dough into the pan. I find a rolling pin most effective in this effort. The dough will be a medium thickness.
Top the crust with a sauce and toppings of your choice. Bake at 400° for about 15 to 20 minutes. Eat and enjoy. Makes 1 pizza.
-
8 ounce can of tomato sauce
1 teaspoon Italian Seasoning OR 1/2 teaspoon basil & 1/4 teaspoon oregano
- 1/4 teaspoon garlic powder
- 1 teaspoon EACH sugar & onion powder
- 1 tablespoon oil for flavoring (optional)
In a large cereal bowl combine the tomato sauce, Italian Seasoning (or basil and oregano), garlic powder, sugar, onion powder and oil. Mix it well and spread it on the pizza crust. This makes enough for a single 16-inch crust. The recipe may be doubled or tripled as desired.
Saturday, March 28, 2009
Raisin Bread
I used this Beginner's Bread recipe and adapted it to make Cinnamon Raisin bread. I liked it, Greg didn't. Before I put it in the loaf pan to raise, I kneaded the cinnamon and sugar and raisin into the dough.
Beginner's Bread
From: Hillbilly Housewife
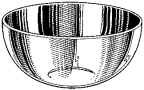 When you need a recipe to practice making bread with, this is the one to turn to. First you need a big bowl. If you don't have a big bowl, then a large pot will work just as well. Measure the flour into the bowl (or pot). White flour is easier to use to make your first batch of dough. Whole Wheat flour makes a simple variation though, when you decide to branch out a little. Make sure your flour measurements are level with the top
  of the measuring cup. Don't pack the flour down into the cup. Just scoop it in lightly, and even off the top of it with your finger by brushing off the excess. After you put your flour into the bowl, add the salt, sugar and yeast. One of the packets of yeast from the store will work just fine. If you have a jar or bag of yeast, then use about 2 teaspoons of it. Using your hands or a spoon or fork, stir the yeast, salt, sugar and flour all together. These are the dry ingredients. They are called dry ingredients because they aren't wet or sticky. They are dry and light. Now measure in your oil. Add a cup of warm water. Do not use hot tap water. Hot tap water is too hot and will kill the yeast. Use warm tap water instead. Warm enough to feel warm to your finger, but not warm enough to scald you. Try to measure the water accurately.
Stir the dough with a fork or spoon until it gets sticky and stiff. Next look at your hands, are they clean? If not then wash them. Remove any rings or watches you may have on and put them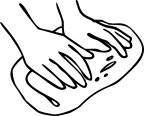 in a safe place. Dig into the dough with your clean hands. It will be gooey, and warm. Work the dough with your hands, right there in the bowl. Scrape the dough off of your fingers as necessary and try to get the dough to all work together into a nice ball. If it is too sticky then add more flour. You may need to add up to 1/2 cup more flour, or even more sometimes. If it is too dry, then add a little bit of water at a time, to get it right. Usually a teaspoon of water at a time, is a good way to go. Mix and mash; Mix and mash. When you get a ball of dough, turn the dough out onto your counter or kitchen table. Scatter a bit of flour about the dough, and around the counter. Knead the dough. Press it, fold it, stretch it, turn it. Keep kneading the dough for a full 5 minutes by the clock. Set the timer if need be. Kneading makes the dough soft and fluffy. Be sure to knead it enough.
Then let the dough sit on the counter for a few minutes while you wash out the bowl you used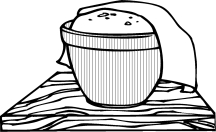 to mix it in. Dry the bowl and pour a little bit of oil into it. A spoonful (teaspoon or tablespoon) will be just enough. Place the ball of dough into the clean bowl, on top of the oil. Roll the dough around in the oil, to coat it evenly. Place the dough in a warm spot, or on the counter near the stove. Cover the top of the bowl with plastic wrap or a tea towel. Allow the dough to sit and rise. It may take the dough up to 2 hours to rise. You will want it to double in size. Be patient and give the dough enough time to get as big as it can. Sometimes this happens in as quickly as an hour, but usually it takes longer, especially if the kitchen is cold.
When it is well risen, punch the dough down. Put your fist into the dough and smash down to force all the air out of it. Knead the dough again. This time, just knead it for a minute or so. Long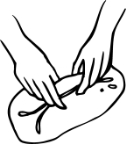 enough to get all the air out of it. Let the dough rest for a minute or two while you oil or grease a loaf pan. A large loaf pan either 9" by 5" or 8½" by 4½" is the perfect size. If you don't have a loaf pan, then use a casserole pan, or a round cake pan. The dough doesn't know what shape it is supposed to be. You have to give it shape. Round bread is sometimes easier to make as a first loaf, so if you don't have a bread pan, use what ever you do have. Just make sure to grease the pan well. Coax the dough into the shape of the pan you are going to bake it in. Cover it with a dish towel or plastic wrap again. Set it aside and let it rise for about an hour to an hour and a half. It should double in bulk again. After it has risen enough, it is time to bake it. Set the oven to 350° or 375°. Place the bread into the oven. You do not need to preheat the oven. Let the bread bake for 30 to 40 minutes. When it is done the top will be golden brown. It will be well risen, and
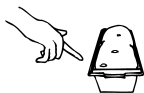 crusty. Carefully turn the hot bread out of the pan and onto a dishtowel on the counter. Be careful not to burn yourself. Thump the bottom with your finger. If it sounds hollow then it is done. If it doesn't sound hollow, then put it back into the pan and bake it some more. Allow the bread to cool down for a few minutes before slicing it.
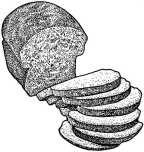 When you slice it be sure to use a serrated (bumpy) edged knife. Saw back and forth across the bread like you are sawing a log. Do not press too hard, just saw gently. When you get your first slice of bread, spread a little margarine or jam on it and take a bite. Succumb to the pleasure which only a bite of your own homemade bread can create. Grin decadently and plan your next loaf.
Or, if this loaf of bread fails, check the recipe and try again. Keep trying until you are satisf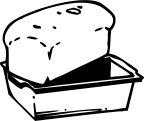 ied with your results. I didn't make it perfectly the first time; I made bricks. Big heavy, chewy, undercooked bricks. It takes practice to get the hang of it, so don't give up. Just keep at it, and before you know it, you will be very pleased with what a little flour and yeast can make up for less than twenty-five cents.
Beginner's Bread
From: Hillbilly Housewife
- 3 cups of white or whole wheat flour, or 1-1/2 cups of each (plus a little extra flour for kneading)
- 1 teaspoon salt
- 1 packet, or about 2 teaspoons yeast
- 1 tablespoon sugar or brown sugar or honey
- 2 tablespoons oil
- 1 cup warm water (not hot, just warm)
When you need a recipe to practice making bread with, this is the one to turn to. First you need a big bowl. If you don't have a big bowl, then a large pot will work just as well. Measure the flour into the bowl (or pot). White flour is easier to use to make your first batch of dough. Whole Wheat flour makes a simple variation though, when you decide to branch out a little. Make sure your flour measurements are level with the top of the measuring cup. Don't pack the flour down into the cup. Just scoop it in lightly, and even off the top of it with your finger by brushing off the excess. After you put your flour into the bowl, add the salt, sugar and yeast. One of the packets of yeast from the store will work just fine. If you have a jar or bag of yeast, then use about 2 teaspoons of it. Using your hands or a spoon or fork, stir the yeast, salt, sugar and flour all together. These are the dry ingredients. They are called dry ingredients because they aren't wet or sticky. They are dry and light. Now measure in your oil. Add a cup of warm water. Do not use hot tap water. Hot tap water is too hot and will kill the yeast. Use warm tap water instead. Warm enough to feel warm to your finger, but not warm enough to scald you. Try to measure the water accurately.Stir the dough with a fork or spoon until it gets sticky and stiff. Next look at your hands, are they clean? If not then wash them. Remove any rings or watches you may have on and put them
in a safe place. Dig into the dough with your clean hands. It will be gooey, and warm. Work the dough with your hands, right there in the bowl. Scrape the dough off of your fingers as necessary and try to get the dough to all work together into a nice ball. If it is too sticky then add more flour. You may need to add up to 1/2 cup more flour, or even more sometimes. If it is too dry, then add a little bit of water at a time, to get it right. Usually a teaspoon of water at a time, is a good way to go. Mix and mash; Mix and mash. When you get a ball of dough, turn the dough out onto your counter or kitchen table. Scatter a bit of flour about the dough, and around the counter. Knead the dough. Press it, fold it, stretch it, turn it. Keep kneading the dough for a full 5 minutes by the clock. Set the timer if need be. Kneading makes the dough soft and fluffy. Be sure to knead it enough.Then let the dough sit on the counter for a few minutes while you wash out the bowl you used
to mix it in. Dry the bowl and pour a little bit of oil into it. A spoonful (teaspoon or tablespoon) will be just enough. Place the ball of dough into the clean bowl, on top of the oil. Roll the dough around in the oil, to coat it evenly. Place the dough in a warm spot, or on the counter near the stove. Cover the top of the bowl with plastic wrap or a tea towel. Allow the dough to sit and rise. It may take the dough up to 2 hours to rise. You will want it to double in size. Be patient and give the dough enough time to get as big as it can. Sometimes this happens in as quickly as an hour, but usually it takes longer, especially if the kitchen is cold.When it is well risen, punch the dough down. Put your fist into the dough and smash down to force all the air out of it. Knead the dough again. This time, just knead it for a minute or so. Long
enough to get all the air out of it. Let the dough rest for a minute or two while you oil or grease a loaf pan. A large loaf pan either 9" by 5" or 8½" by 4½" is the perfect size. If you don't have a loaf pan, then use a casserole pan, or a round cake pan. The dough doesn't know what shape it is supposed to be. You have to give it shape. Round bread is sometimes easier to make as a first loaf, so if you don't have a bread pan, use what ever you do have. Just make sure to grease the pan well. Coax the dough into the shape of the pan you are going to bake it in. Cover it with a dish towel or plastic wrap again. Set it aside and let it rise for about an hour to an hour and a half. It should double in bulk again. After it has risen enough, it is time to bake it. Set the oven to 350° or 375°. Place the bread into the oven. You do not need to preheat the oven. Let the bread bake for 30 to 40 minutes. When it is done the top will be golden brown. It will be well risen, and crusty. Carefully turn the hot bread out of the pan and onto a dishtowel on the counter. Be careful not to burn yourself. Thump the bottom with your finger. If it sounds hollow then it is done. If it doesn't sound hollow, then put it back into the pan and bake it some more. Allow the bread to cool down for a few minutes before slicing it.When you slice it be sure to use a serrated (bumpy) edged knife. Saw back and forth across the bread like you are sawing a log. Do not press too hard, just saw gently. When you get your first slice of bread, spread a little margarine or jam on it and take a bite. Succumb to the pleasure which only a bite of your own homemade bread can create. Grin decadently and plan your next loaf. Or, if this loaf of bread fails, check the recipe and try again. Keep trying until you are satisf
ied with your results. I didn't make it perfectly the first time; I made bricks. Big heavy, chewy, undercooked bricks. It takes practice to get the hang of it, so don't give up. Just keep at it, and before you know it, you will be very pleased with what a little flour and yeast can make up for less than twenty-five cents.
Blondies
Very easy to make. Took these to Kevin and Sarah's for dessert. We put the leftover icing from the sugar cookies on the top. I think they could have done with out the icing on the top...but they were pretty good!
Blondies
From: Hillbilly Housewife
To fluff up your flour before measuring it, just stir it with a spoon to incorporate some air. If you can't sift or stir your flour then reduce the amount called for to about 2-1/2 cups.
Blondies
From: Hillbilly Housewife
- 1 cup margarine, softened (2 sticks)
- 1 cup brown sugar
- 1 cup white sugar
- 4 medium eggs
- 2 teaspoons vanilla
- 3 cups flour (sifted or fluffed before measuring)
- 1 tablespoon baking powder
- 1 teaspoon salt
- 1 cup peanuts, optional
To fluff up your flour before measuring it, just stir it with a spoon to incorporate some air. If you can't sift or stir your flour then reduce the amount called for to about 2-1/2 cups.
Quick Sugar Cookies
These were super easy to make. The kids had fun decorating them!
Quick Sugar Cookies
From: Hillbilly Housewife
- 1/2 cup soft margarine or shortening
- 1 cup white sugar
- 1 medium egg
- 1 tablespoon milk
- 1 teaspoon vanilla
- 1/4 teaspoon almond flavoring (optional)
- 1/2 teaspoon salt
- 1 teaspoon baking powder
- 1-1/2 cups flour
If desired, you can color the dough with food coloring for special occasions. You can also form them into small balls and roll them in a little granulated sugar right before baking.
I love this recipe because it is so easy to prepare. I think it goes together even faster than most cookie mixes. It is cheap and easy too, costing only about 50¢ to 60¢ for the whole batch. If desired, this recipe can easily be doubled.
We doubled this recipe. I used my BIG cookie scoop for the 1st batch. Decided after that to use my small cookie scoop and then smash the balls down. They worked really good. These tasted really good, and were much easier than rolling out sugar cookie dough! The kids liked decorating them.
Monday, March 23, 2009
Sweet Potato Wedges
We had never really had sweet potatoes much. I have been buying them for Miles and making him mashed sweet potatoes (homemade baby food!!). So I though we could try them. They were pretty good. Greg said they needed something. We will work on this some more. Maybe try and find a different recipe. But still pretty good.
Sweet Potato Wedges
From: Gluten-Free, Dairy-Free, Sugar-Free
Wash a medium-sized yam or sweet potato and cut off the ends, leaving the skin intact. With a sharp knife (be careful here!), slice the potato in half and then into wedges no more than 1-inch thick. Drizzle 2 tablespoons of olive oil into a baking dish and preheat the oven to 350 degrees F. Place the potato wedges in the pan and toss lightly to coat with oil. Sprinkle with sea salt. Bake for about 45 minutes, testing with a fork for desired softness. Allow to cool slightly (10 minutes), then eat em’ while they’re hot!
Subscribe to:
Posts (Atom)
